The printable version is no longer supported and may have rendering errors. Please update your browser bookmarks and please use the default browser print function instead.
Chapter 3: Editing Views
About View Resources
 |
View resources are used for the animation, characters, props, icons, and general graphics in your game. Each view resource contains one or more loops, and one or more cels. Cels are the frames of animation, and loops are the groups containing the cels.
|
Getting Started
We'll begin with the basics by editing a view.
 |
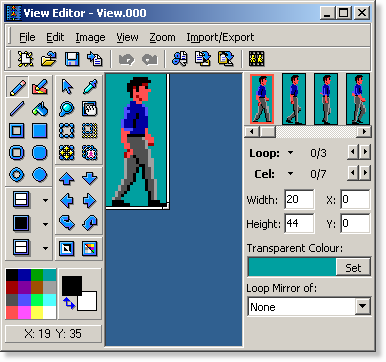
The first view in the game is the ego view. Ego is the name of the main character in your game. Double click on it in the Game Explorer and the View Editor will open up.
|
The View Editor
Click on the "Zoom" button, then the canvas to get the view to your desired size for drawing.
 |
Next, click the animate button. The View Animator window will pop up.
|
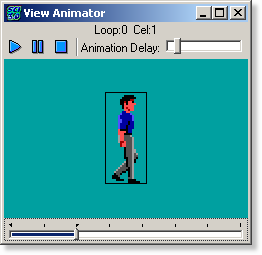 |
The View Animator allows you to view the current loop's cels in action. In the ego, and other character views, loop 0 is for the character's right direction, loop 1 is for the left direction, loop 2 is for the down direction, and loop 3 is for the up direction.
|
 |
You can change the loop and cel by clicking the arrow buttons on the right side of the editor. Try changing the loop and clicking on the animator again to view another loop in action.
|
 |
Now that you understand the general concept of view resources, you can begin editing the graphics. The middle toolbar contains all the drawing tools necessary to do this. Clicking on the tool's button allows you to select which tool to draw with. Clicking on the palette on the right side of the window allows you to choose which colors you wish to draw with. Left clicking the palette will allow you to select which color will be used to draw when you left click the canvas. Right clicking allows you to select which color to use when you right click on the canvas.
|
Select any tools you like and play around with the graphics. You can also dock and undock the toolbars and shown on the left to free up more screen space.
 |
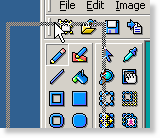
When done drawing, click the save button to save your view. If you were editing a view without your game being open, it would execute a "Save as..." dialog box allowing you select the file to save it as. Since you are editing the view from your game, the "Add Resource" window will pop up.
|
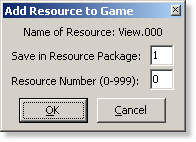 |
The Add Resource window allows you to save the view directly to your game's resource package. You can select which view number to save it as, as well as which package to save it to. Since we are just changing an existing view, we will leave the number the same so the game will recognize it. The resource package, 1 by default, is the package you choose to save the view to. There's no reason to change it. Back when games did not fit on single floppy disks, Sierra would split them up into multiple packages and put one on each disk. Since we now share our media over the Internet and on CDs, there's no need for this. All you need to do is click "OK" and your view will be saved.
|
Now that you've finished editing the view and saved it, you can close the View Editor.
Back in the Resource Explorer, you will see that the view has been updated with your changes.
 |
Click on the Run button in the main window's toolbar to play the game with your updated view. As soon as the ego shows up, you'll see any changes you made to it. Exit the game through the "File"->"Quit" menu and you will return to SCI Studio.
|
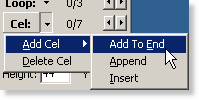 |
The adding and deleting of loops and cels can be done by accessing the loop and cel menus on the right sidebar, or the top menu bar.
|
Congratulations! You now know how to edit view resources.
< Previous, Chapter 2 - Creating The GameNext, Chapter 4 - Editing Cursors >


