SCI Studio Tutorial Chapter 5 - Editing Fonts
About Font Resources
Getting Started
In the Game Explorer, there's a list of the game's resources.
 |
Click on the font folder and the list of font resources will appear on the right, along with a preview of the first font. |
| Double click the second font resource (named "Default Font") and the font editor will open up. Default Font is the game's default font. It is used for the Menubar, window titles, and general text with an unspecified font. |
The Font Editor
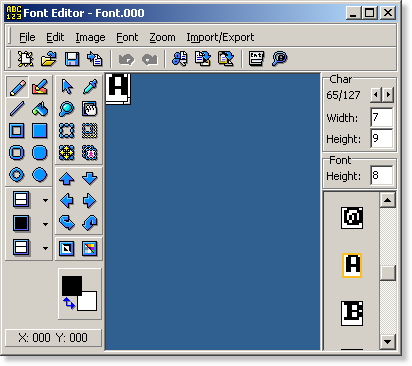
The Font Editor will load up with the font you selected. You can select the character you wish to edit with either the arrow buttons, or the character set on the right side bar. Once you've selected the char you wish to edit, you can modify it to your liking using the the drawing tools. These operate identical to the view editor and cursor editor's tools.
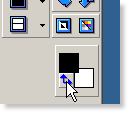
| By default, the left mouse button draws black pixels and the right button draws white pixels. This can be changed though, by clicking on the color swap button. |
| You can view all the characters in your font by clicking on the "Font Viewer" button. This will display a window showing all the characters in your font. |
| You can test your font with the font tester. Simply click on the "Font Tester" button. It will display an "Enter Input" window with an edit field allowing you to enter text. |
For the purpose of trying out the font editor, edit some characters. You can edit character #1 to change the game's first menu's image, for example.
Once done editing the font, you can save it.
| Click the save button, and the "Add Resource" window will pop up. As discussed in chapter 3, you just need to click "OK". |
Now that the you've finished editing the font and saved it, you can close the Font Editor.
Back in the Resource Explorer, you will see that the font has been updated with your changes.
| Click on the Run button in the main window's toolbar to play the game with your updated font. As soon as the game loads, you will see your updated characters. |
Congratulations! You now know how to edit font resources.
< Previous: Chapter 4 - Editing CursorsNext: Chapter 6 - Editing Pics >


