Point and Click Tutorial: Chapter 1 - Preparing the Main Script
Chapter 1 - Preparing the Main Script
This chapter is the first step towards creating a total point and click interface. I will first off say that this tutorial is by no means the only way to accomplish this feat and certainly isn't even close to being the best way of doing it. With my virtually nonexistent programming knowledge, it is what slowly formed from my fiddling around with SCI programming and it works. I'm going to tell you right up front, there are smarter people than me who could make something that is a lot more fluid, but I put in the work and it is fully functional so I may as well share. So with that let's get started.
Lets begin in the Main script
Open up the main script and just below this
Code:gLoadingCursor = 997 /* the number of the loading cursor (i.e. hand) */
We'll go ahead and add in these new variables
Code:gPreviousCursor=999 // Used when leaving inventory screen empty handed itemIcon = 900 // cursor number of inventory item last selected canTab = TRUE // Allow access to inventory room totalcash = 100 // An Inventory Item, Cash in pocket at start
OK, so far so good right, see this isn't going to be as hard as you thought it was going to be.
Let's add in a Couple of Inventory Items
The first item, which you may have been able to guess, just from the variables that we added above is cash. Really, everything about the way we are using this could also be used for any item that we would have a pocketful of, for example the rocks that we all loved to throw at anything and everything in Hero's Quest. But I digress, back to actual work, the other three items we are going to be adding are a balloon, a string, and a balloon with a string (it's actually the string and balloon combined).
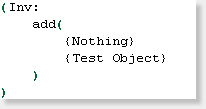
I'm not going to go into great detail here explaining how to add inventory items to the main script, if you don't know how, check out chapter 18 of the Volume I Tutorials. So without further ado, about a quarter of the way down, change the inventory add to this.
This is what we want
Code:(Inv:add( {Nothing} {Cash} {Balloon} {Striiing} // Just to make sure there is no confusion with string variables {StriiingBalloon} ) )
So, with that done let\s head down to the bottom of the script and take care of the inventory's instances. Now you may notice right away that these instances seem to be lacking in a few of the standard properties that you would normally have. Let me explain, by the end of this tutorial we will have an inventory "room" which is going to handle all of the views and whatnots so we don't need those here. Also, there isn't going to be anymore saying anything, so we definitely don't need that part here anymore. Now as for the descriptions, we still need those, but we don't need them here taking up valuable heap space by cluttering up the main script with miscellaneous text strings since this script gets loaded in almost every other script, as you will probably figure out from doing this tutorial, I am anal about trying to preserve my heap space memory, probably to a fault, but the more I can save and get back, the more I can use for other stuff. You'll see what I mean when we start actually scripting a room, but for now trust me when I say that this is all we need and let's roll with it.
Code:(instance Nothing of Iitem(properties)) (instance {Cash} of Iitem(properties)) (instance {Balloon} of Iitem(properties)) (instance {Striiing} of Iitem(properties)) (instance {StriiingBalloon} of Iitem(properties))
OK, all done here. Compile the main script, and don't forget, after you do you must compile all scripts. ANY time you change the main script you need to "compile all" or things may go a little crazy with your game. But for now, that is all that we need to do in here so you can close it up.
Don't forget about game.sh
So pop open the game.sh file real quick and make the inventory section look like this.
Code:// Inventory Items (define INV_NOTHING 0) (define INV_CASH 1) (define INV_BALLOON 2) (define INV_STRIIING 3) (define INV_STRIIINGBALLOON 4)
That sums up the edits of the main script.
< Previous: SCI Point and Click Tutorial Introduction Next: Chapter 2 - Ordering the Cursors >


